springframework-course
Steps for Running Sample Project in Local WorkStation
- Download the zip from here or clone the Git repository from here.
- Unzip the zip file (if you downloaded one)
- Open Command Prompt and Change directory (cd) to folder containing pom.xml
- Open either IntelliJ or Eclipse
- Choose the Spring Boot Main Application file and run the application
- You are all Set
OR
Create a Spring Boot Project using Spring Initializr for any Development IDE
- Setting up a Spring Project using Spring Initializr http://start.spring.io
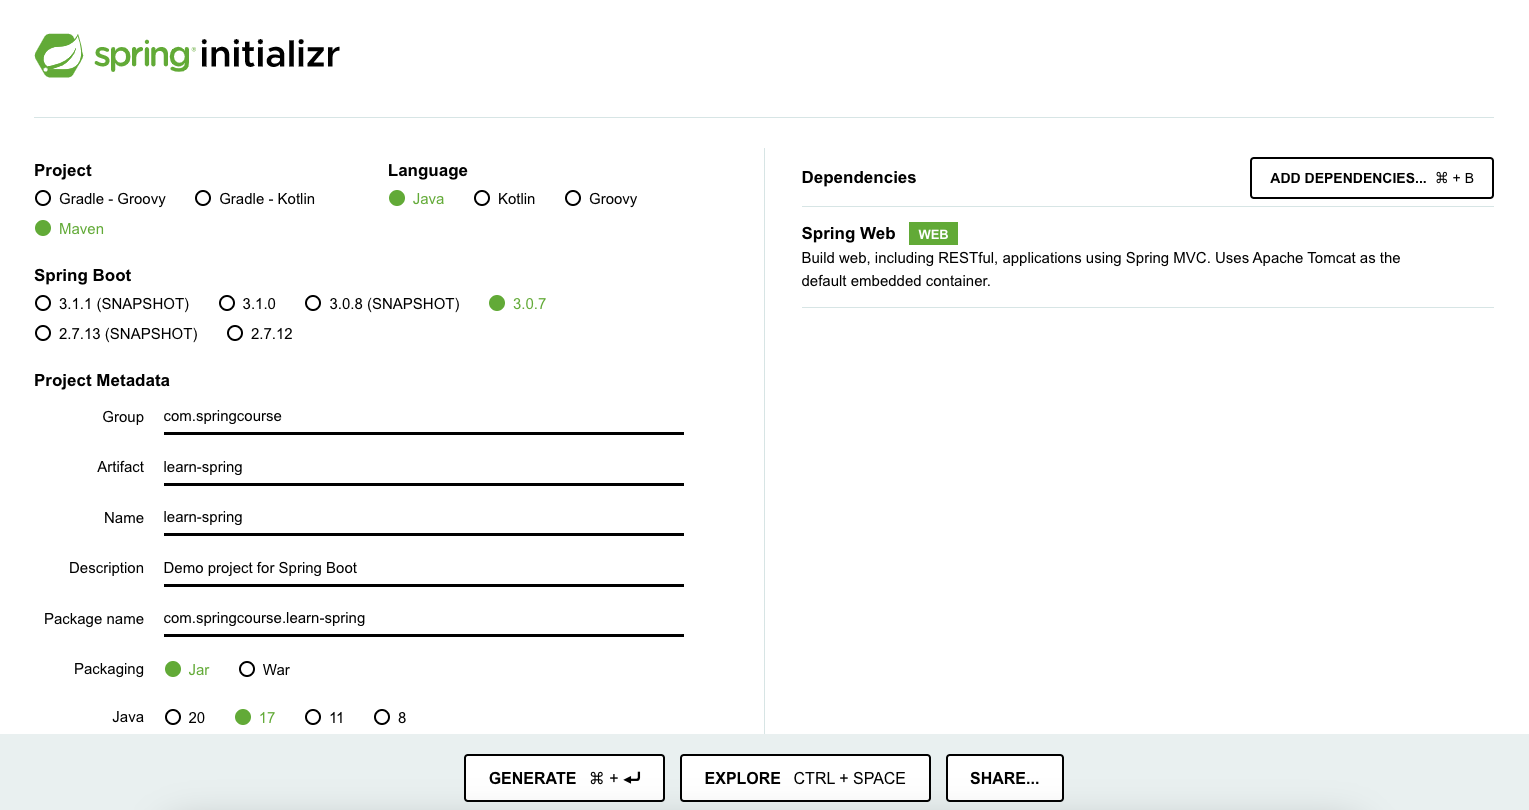 In the above image, please select the following options
 - Project as
MavenorGradle - Language as
JavaorKotlin - Spring Boot Version as
3.0.7or latest one - Project Metadata as
- Group as
com.springcourse - Artifact as
learn-spring - Name as
learn-spring - Description can be your choice
- Package name automatically generated by the tool based on Group, Artifact
- Packaging as
jar - Java version as
17for now - Type “web” into the search box, and we’ll obtain Spring Web and add it
- Click the “Generate” button to create a project zip file with the basic spring boot application structure
- Group as
1. Create a Spring Boot Project in IntelliJ IDEA
The IntelliJ integrated development environment (IDE) is a Java-based program.
Steps:
- Install IntelliJ IDEA on a Local Machine
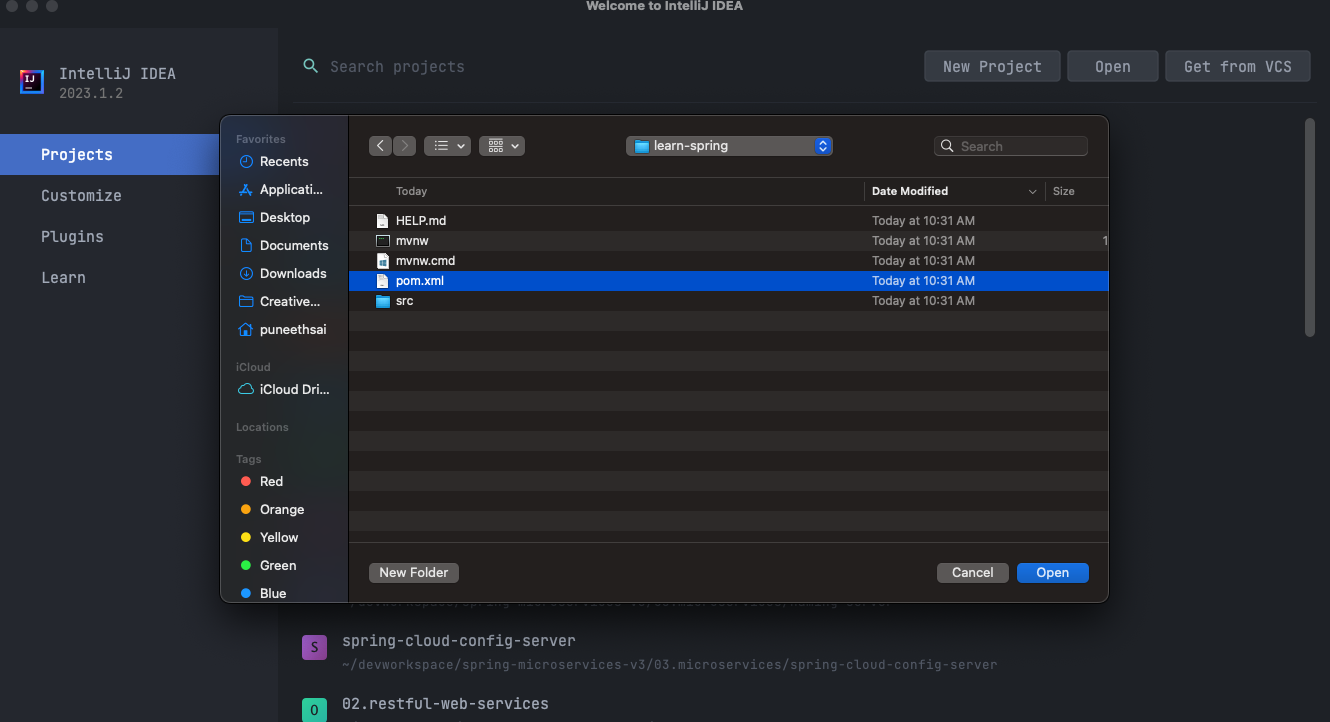
- Launch Intellij and Click “Open” and Navigate to the folder containing the spring boot project
- Inside folder select “pom.xml” and click on “Open” Button
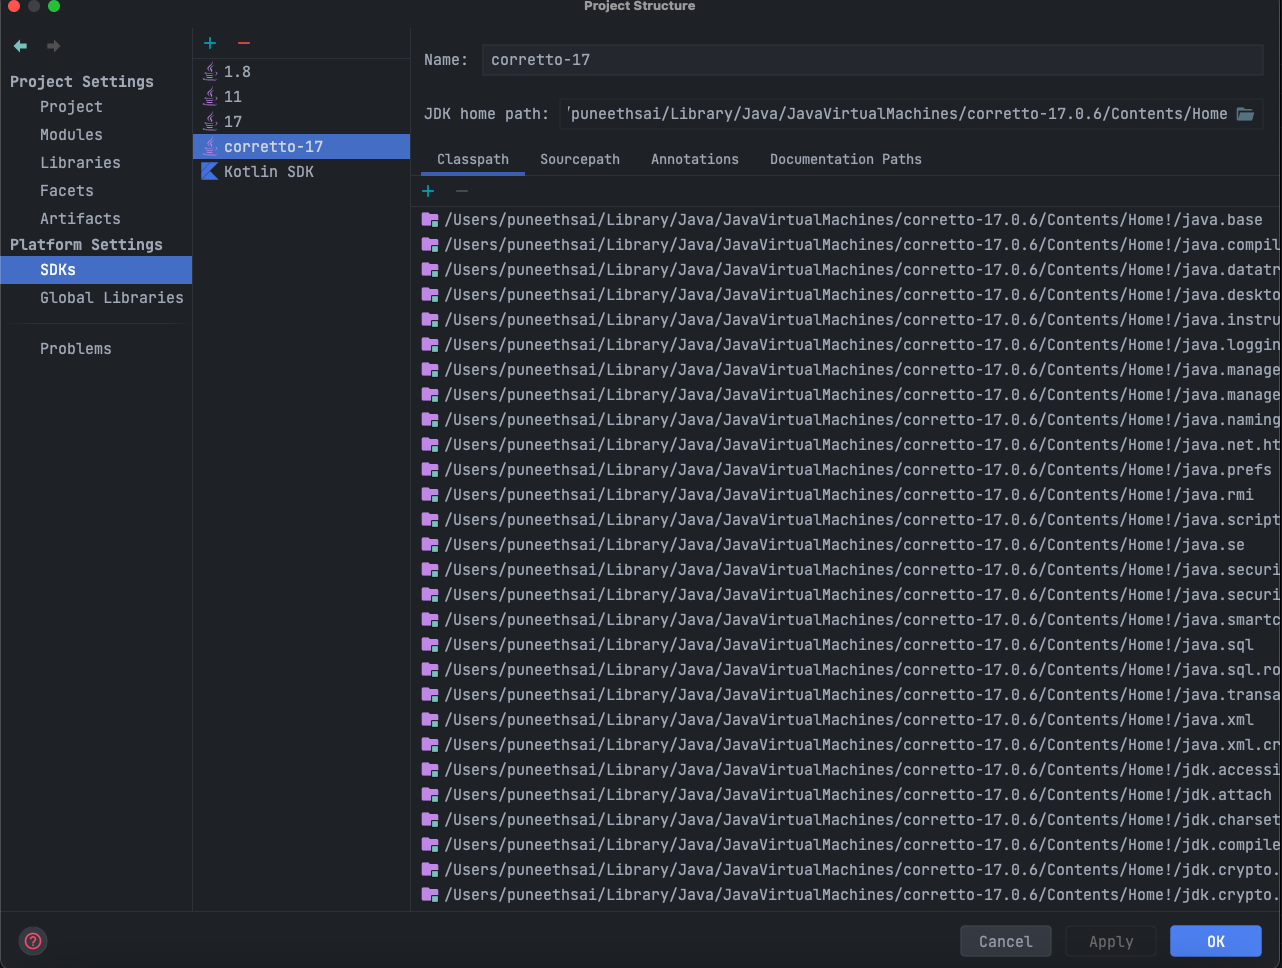
- Since we are working on JDK 17, after importing the project we need to perform we need to select correct JDK version
Step 1: Installation of IntelliJ IDE
- Install IntelliJ IDE by going through Tools & Prerequisites
Step 2: Import Spring Boot Project in IntelliJ IDE

Step 3: Inside folder selects “pom.xml” and clicks on “Open” Button
Step 4: Since we are working JDK 17, after importing the project, we need to select the correct JDK version
- File > Project Structure > Project Settings select as per the below screen
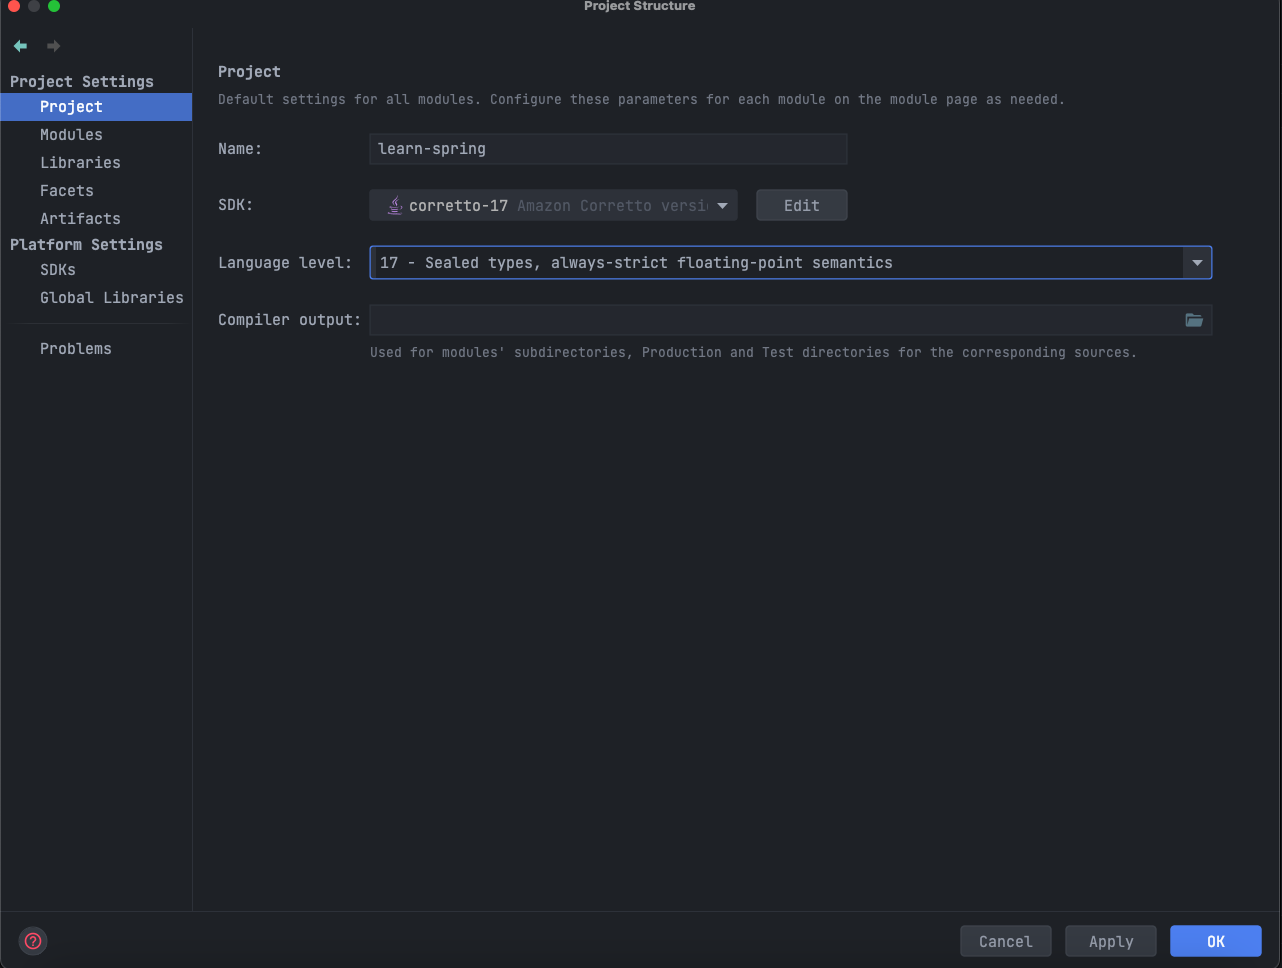
- File > Project Structure > Platform Settings select as per the below screen
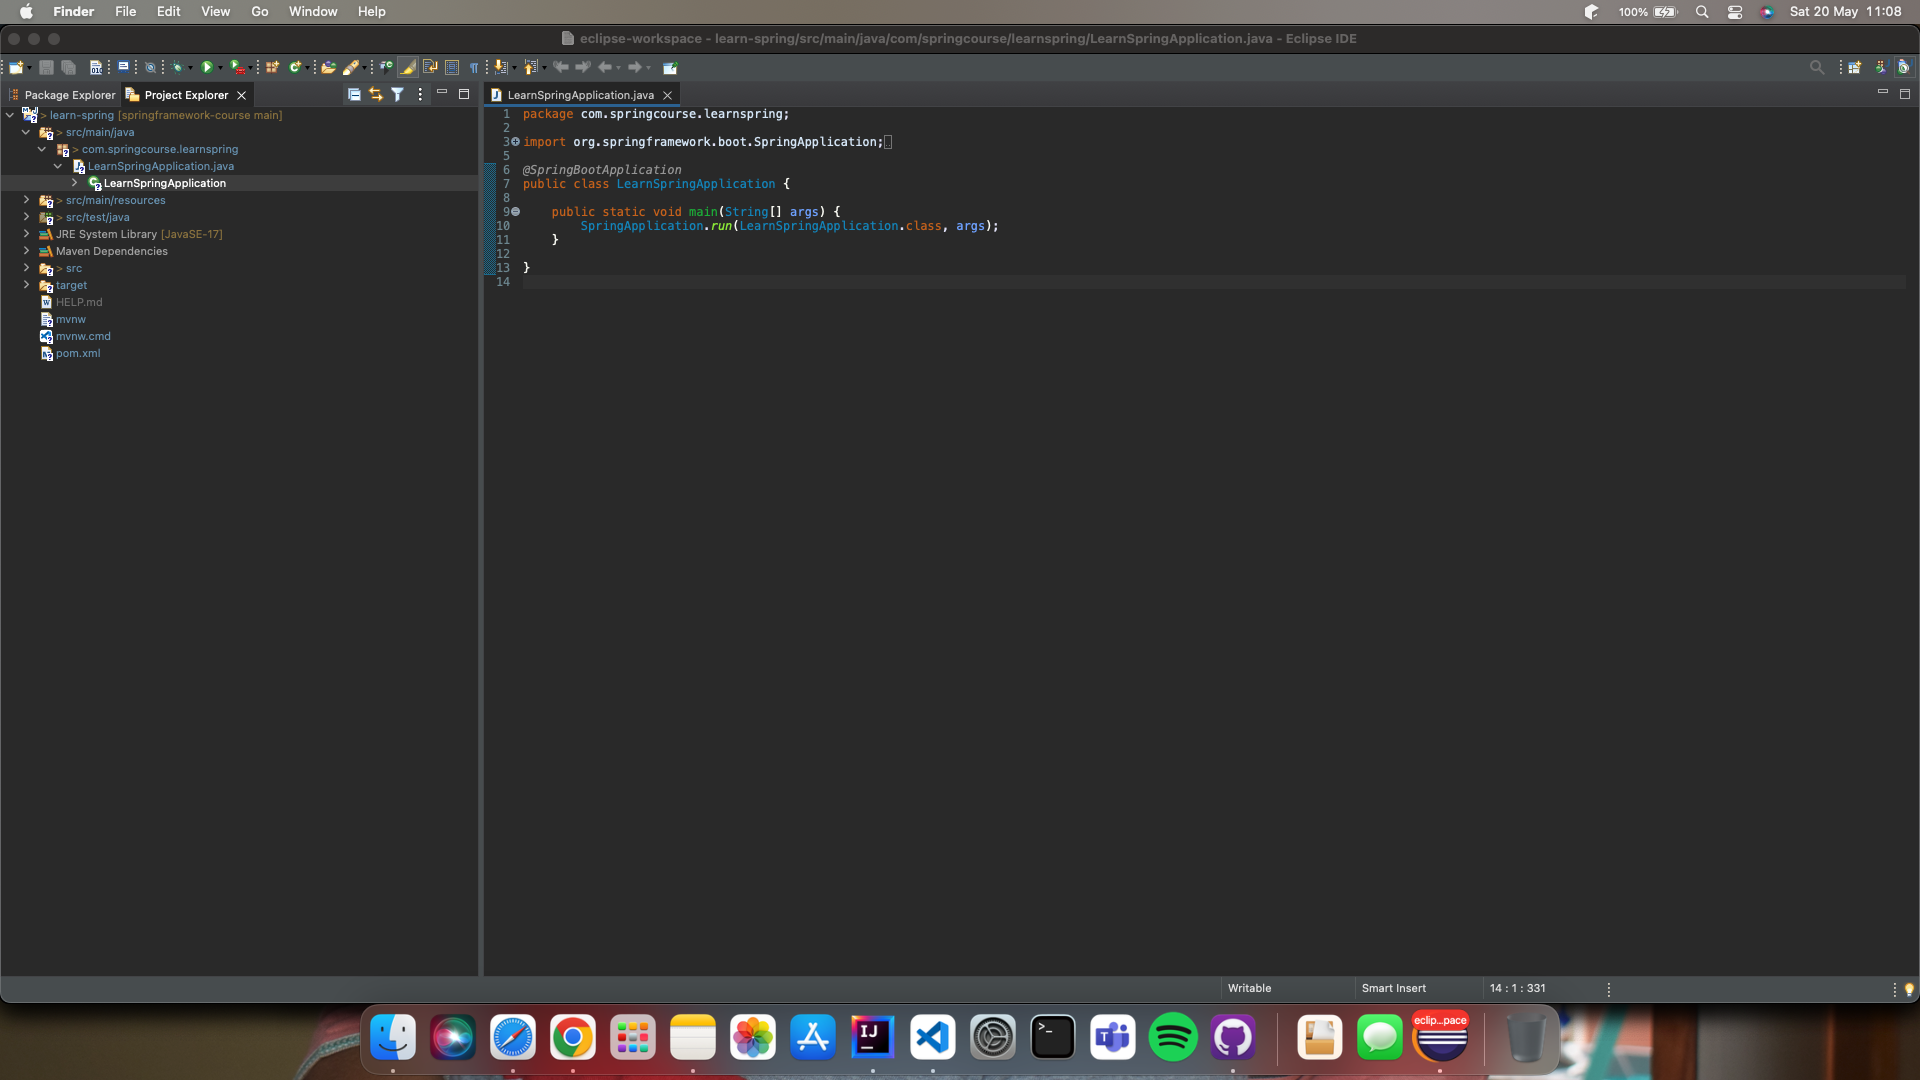
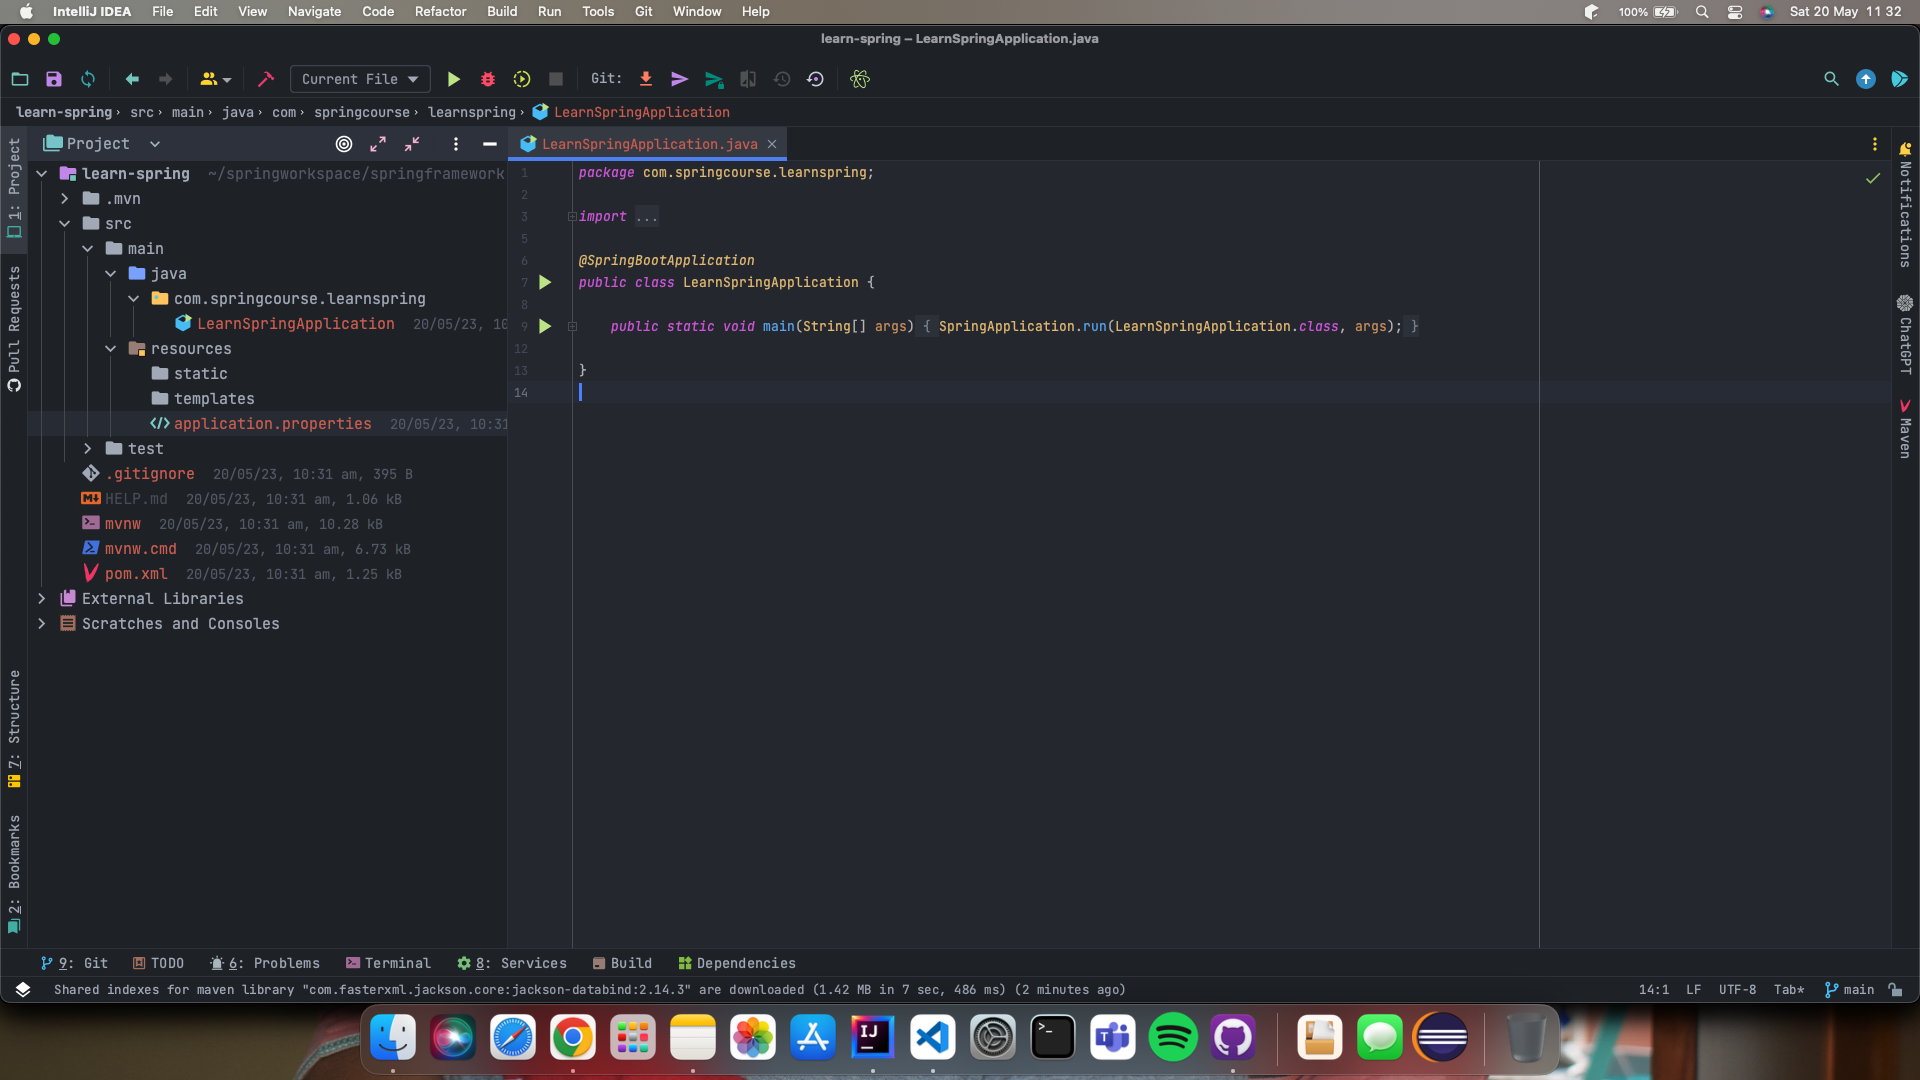
The Spring Boot project has now been completed, as shown in the image below. The Project file structure is shown on the left side, while the Code Editor is shown in the middle.
2. Create Spring Boot Basic Application in Eclipse IDE
The Java Integrated Development Environment (IDE) is well-known in the Eclipse IDE.
Steps:
- Install Eclipse IDE for Enterprise Java and Web Developer
- Import Spring Boot Project in Eclipse IDE.
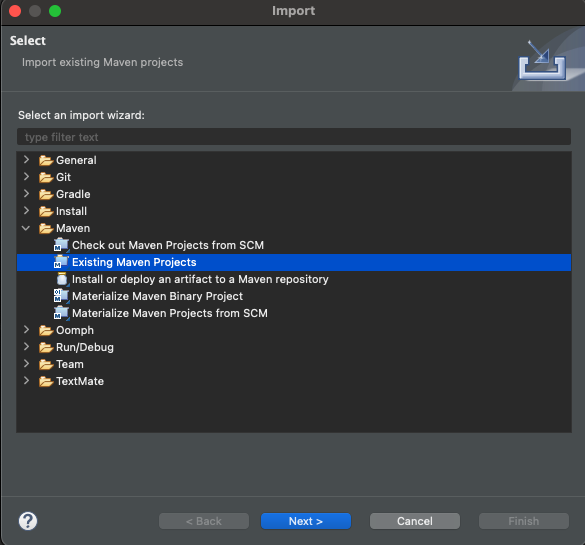
- Search for “maven” and Choose Existing Maven Project.
- Choose Next.
- Click on the Browse button and select the extracted zip.
- Click on the Finish button, and we are done with the importing the spring boot project.
Step 1: Installation of Eclipse IDE
- Install Eclipse IDE by going through Tools & Prerequisites
Step 2: Import Spring Boot Project in Eclipse IDE
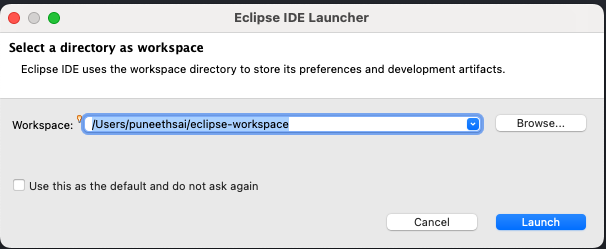
- Open Eclipse
- File -> Import -> Existing Maven Project -> Navigate to the folder where you unzipped the zip
- Select the right project
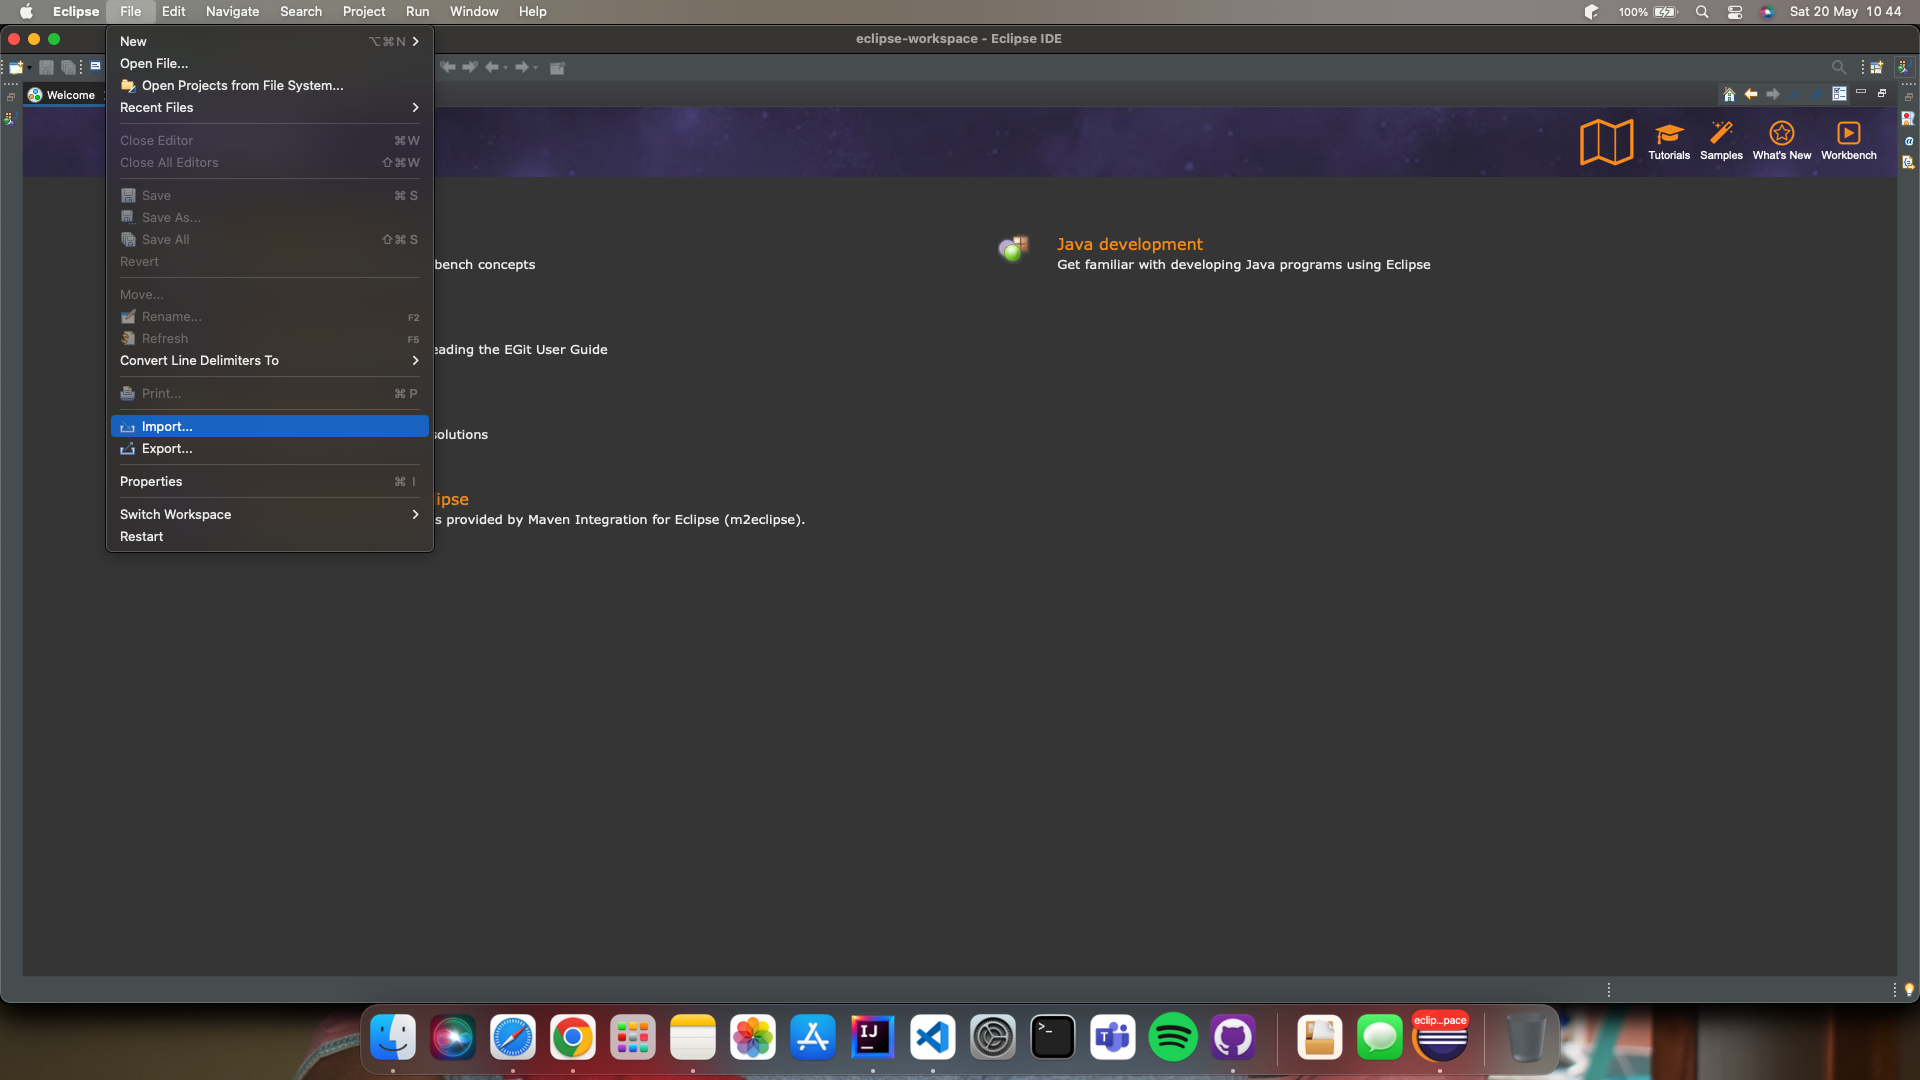
Step 3 & 4: Search for “maven” and Choose Existing Maven Project and Choose Next button
Step 5: Now click on the Browse button and navigate to the folder containing the unzipped spring boot project
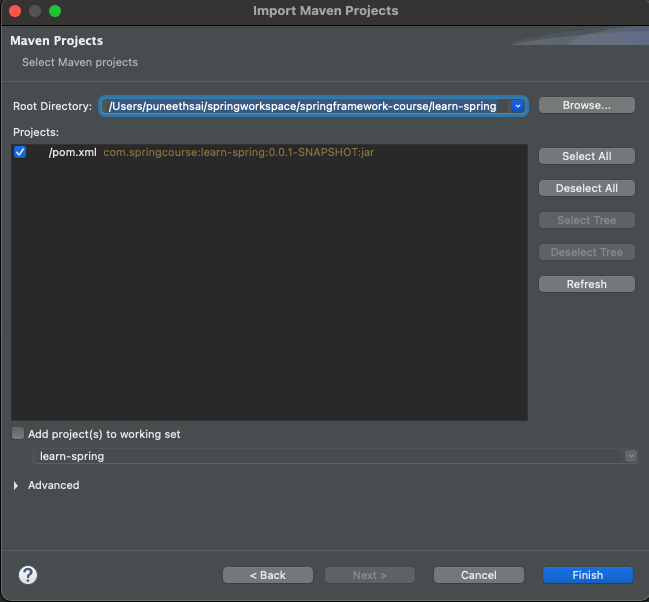
Step 6: Click on the Finish button, and we are done with the importing the spring boot project.
The Spring Boot project has now been completed, as shown in the image below.
